Your First Ionic App: Angular
The great thing about Ionic is that with one codebase, you can build for any platform using familiar web tools and languages. Follow along as we create a working Photo Gallery. Here’s the before and after:
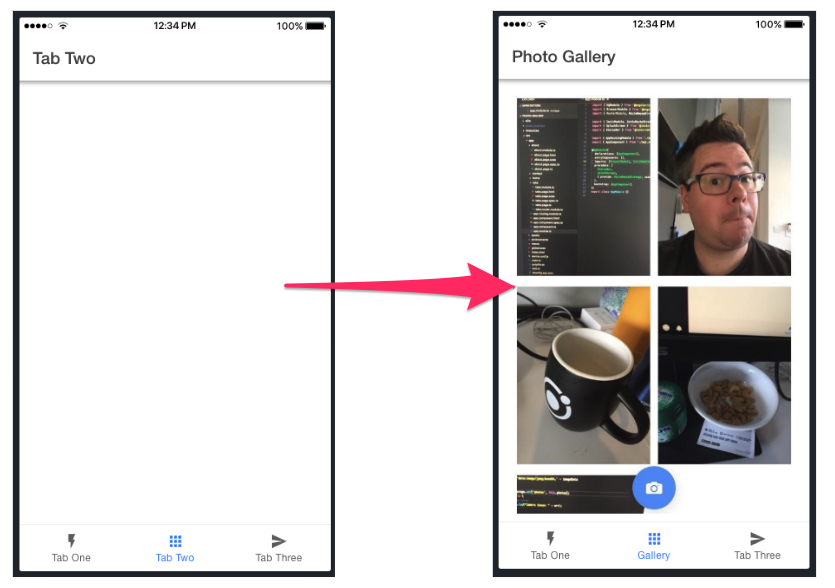
It’s easy to get started. Note that all code referenced in this guide can be found on GitHub.
Required Tools
最適な Ionic 開発環境を整えるため、次のツールを先にダウンロードしてインストールしてください。
- Git:バージョン管理用。
- SSHクライアント:PuTTyなど、Appflowへの安全なログイン用。
- Node.js:Ionicエコシステムとやり取りするため。LTSバージョンをダウンロード。
- コードエディタ:コードを書くため! 私たちはVisual Studio Codeのファンです。
- コマンドラインターミナル(CLI):ちなみにWindows ユーザーは、最高のIonic体験のために、管理者モードで実行する組み込みコマンドライン(cmd)またはPowershell CLIを推奨します。 Mac/Linuxユーザーには、ほぼどのターミナルでも動作します。
Ionic と Cordova のインストール
Run the following in the command line:
npm install -g @ionic/cli cordova
The -g option means install globally. When packages are installed globally, EACCES permission errors can occur.
npm を昇格権限なしでグローバルに操作できるよう設定することを検討してください。詳細は権限エラーの解決を参照してください。
Create an App
Next, create an Ionic Angular app using our “Tabs” app template:
ionic start photo-gallery tabs
This starter project comes complete with three pre-built pages and best practices for Ionic development. With common building blocks already in place, we can add more features easily!
Next, change into the app folder:
cd photo-gallery
以上です!さて、楽しい部分です - アプリを実行してみましょう。
Run the App
Run this command next:
ionic serve
And voilà! Your Ionic app is now running in a web browser. Most of your app can be built right in the browser, greatly increasing development speed.
Photo Gallery!!!
There are three tabs. Click on the Tab2 tab. It’s a blank canvas, aka the perfect spot to add camera functionality. Let’s begin to transform this page into a Photo Gallery. Ionic features LiveReload, so when you make changes and save them, the app is updated immediately!
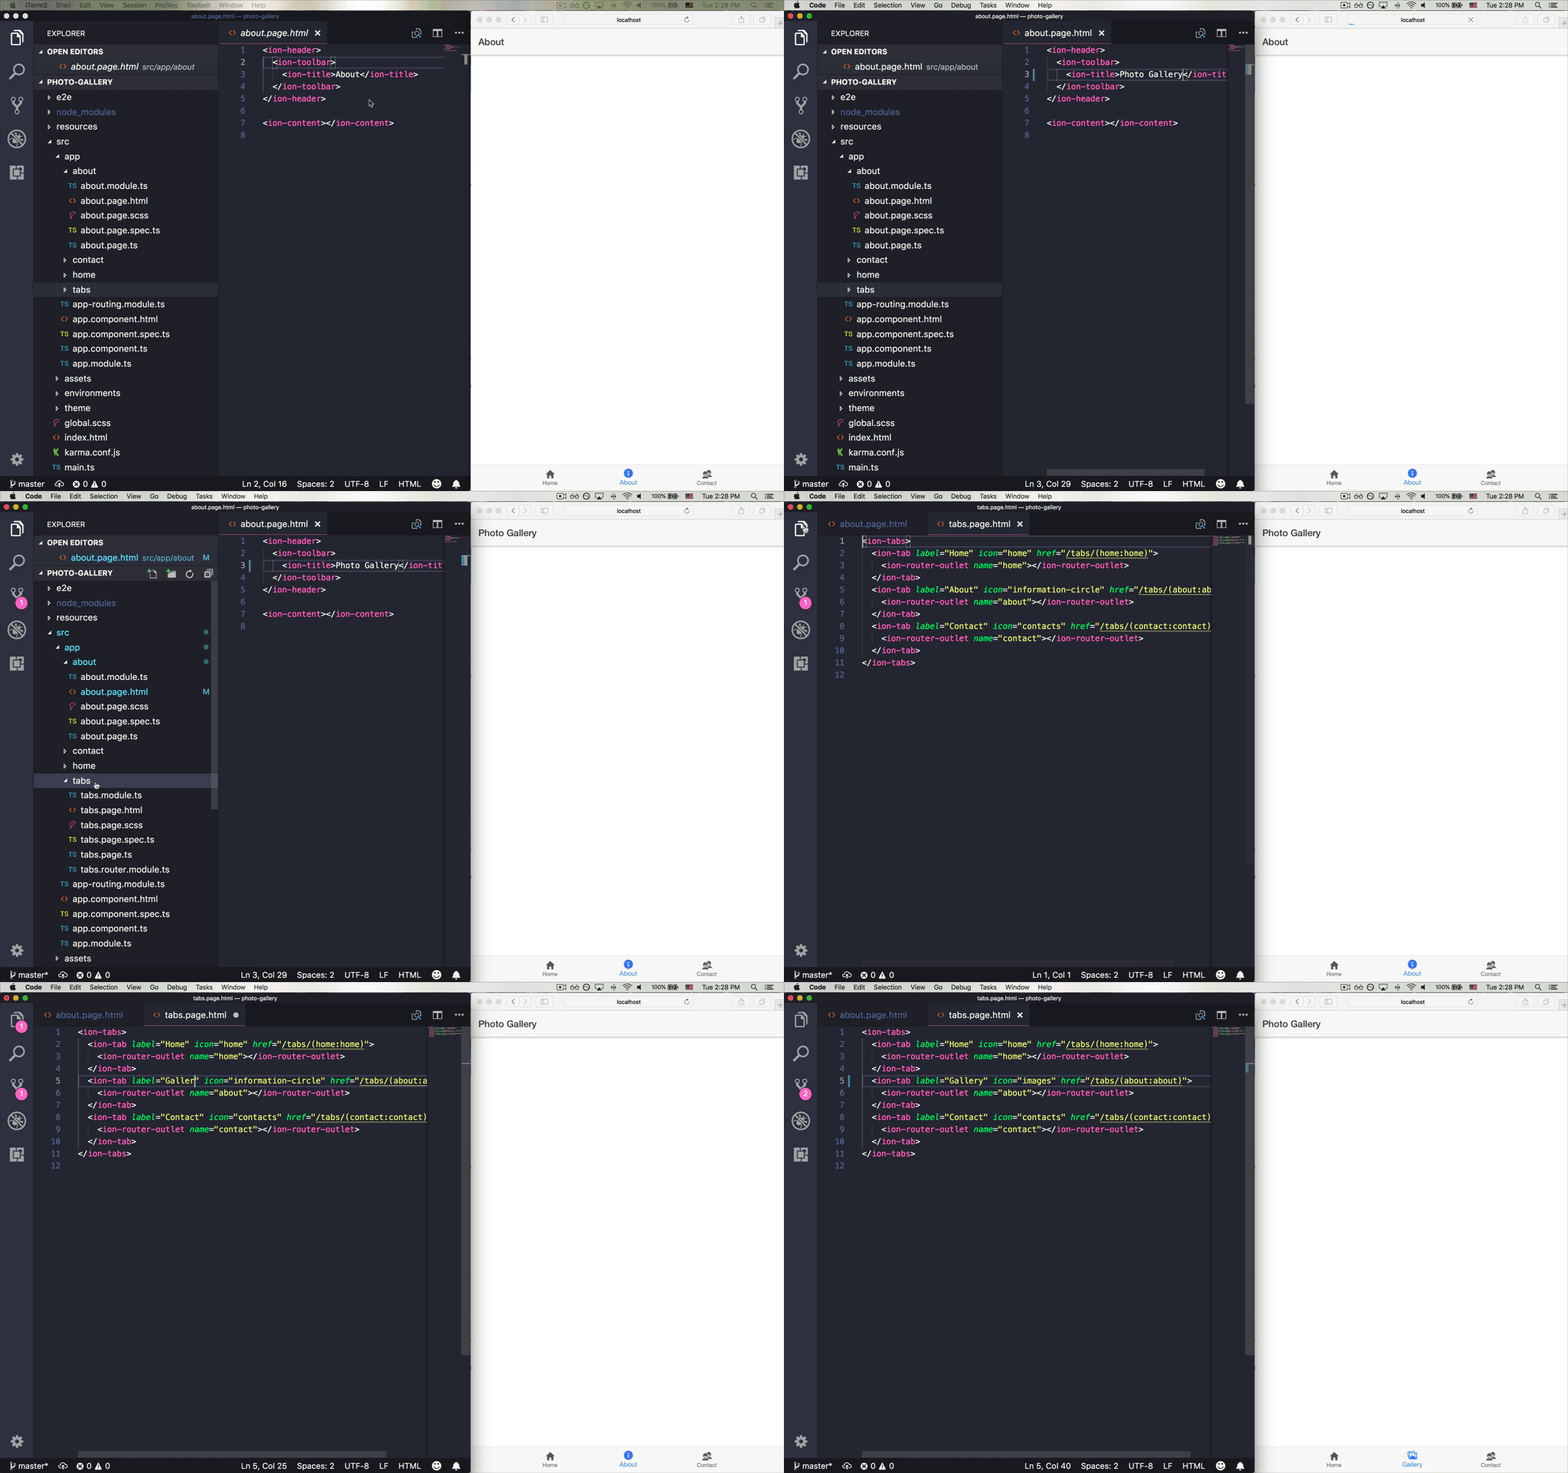
お気に入りのコードエディタで photo-gallery アプリのフォルダを開き、次に/src/app/tab2/tab2.page.htmlに移動します。それには以下が含まれます:
<ion-header>
  <ion-toolbar>
    <ion-title>Tab Two</ion-title>
  </ion-toolbar>
</ion-header>

<ion-content class="ion-padding"></ion-content>
ion-header represents the top navigation and toolbar, with "Tab 2" as the title. We put our app code into ion-content. In this case, it’s where we’ll add a button that opens the device’s camera and shows the image captured by the camera. But first, let’s start with something obvious: renaming the Tab Two page:
<ion-title>Photo Gallery</ion-title>
Next, open src/app/tabs/tabs.page.html. Change the label to “Gallery” and the icon name to “images”:
<ion-tab-button tab="tab2">
  <ion-icon name="images"></ion-icon>
  <ion-label>Gallery</ion-label>
</ion-tab-button>
That’s just the start of all the cool things we can do with Ionic. Up next, we’ll deploy the app to your iOS or Android device, then continue building the photo gallery.